Hello, all! I am still around. It has been kind of a rough week and I did ZERO sewing. This morning I have been cleaning in my sewing rooms. Yes, I said rooms. I have enough fabric in the dresser, totes and closet of a second room along with my ironing board I have to claim it, too. God help me.
First off I have to say a BIG thank you! to my blog buddy, Stephanie, over at My Imperfect Life. She read in my blog about my BIL wanting a Marine quilt. She went off to her local quilt shop and found the exact fabric I wanted and is mailing it to me. How sweet is that?
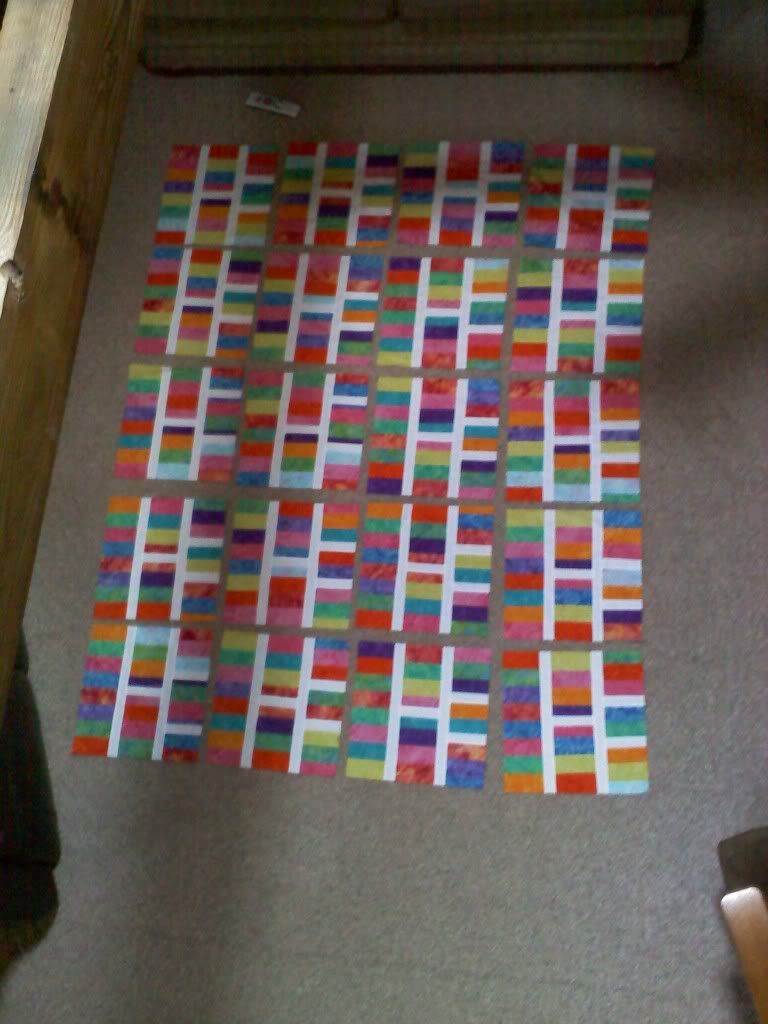
Okay, now for the opinion part. Last week I posted a picture of the quilt I was working on for my niece for graduation. I have since tried other layouts. Big mistake. Now I don't know what to do!
This is the original plan
Pretty busy, huh?
Okay, I laid it back out and kept them all the same direction. Problem is they aren't all exactly the same blocks.
This seems to be well liked by my sister and SIL but my sister says that may be their age. They are 40.
I tried another version of rotating them but only 90° every other block.
My final version rotates every other row 180°. I can live with it.
So, are you dizzy yet? The recipient loves orange and hot pink. All blocks will be sashed with the same width white strips you see in the blocks. They sew out to 1 1/4" to get the dimensions in the blocks to work.
Give my your honest opinion, PLEASE!
I did play with fabric some this week.
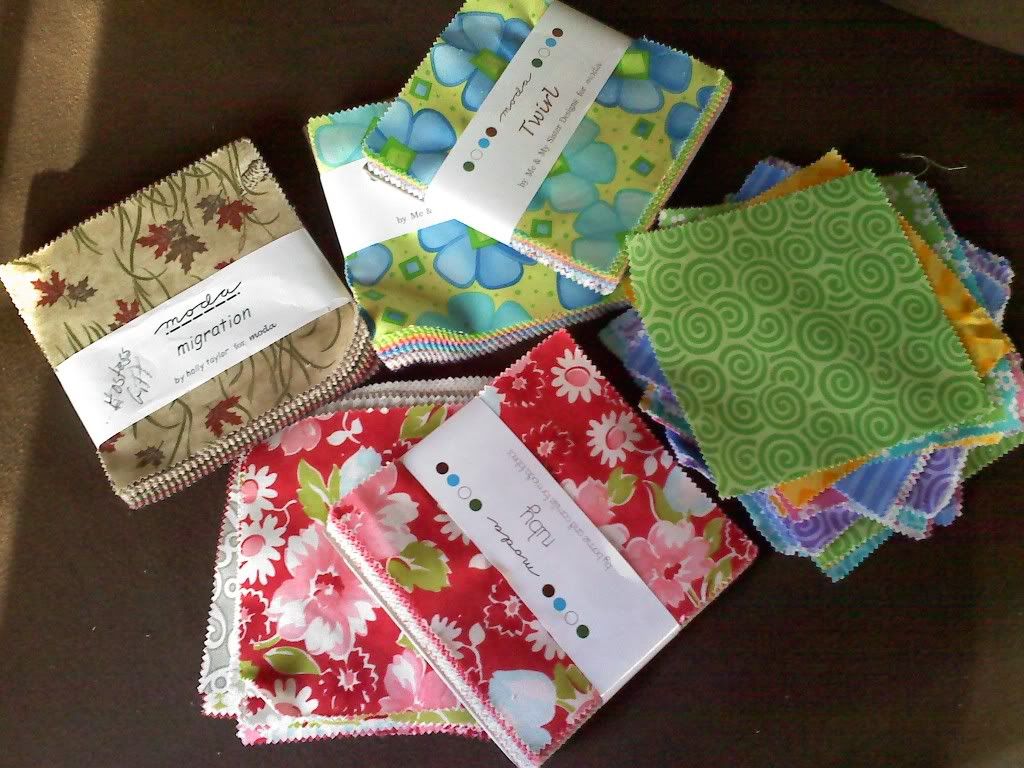
I have all of these now.
And am at a loss what do do with them. I have never used a charm pack for anything. You will note I have two each of Ruby and Twirl. I also have a yard of coordinating fabric for each of those.
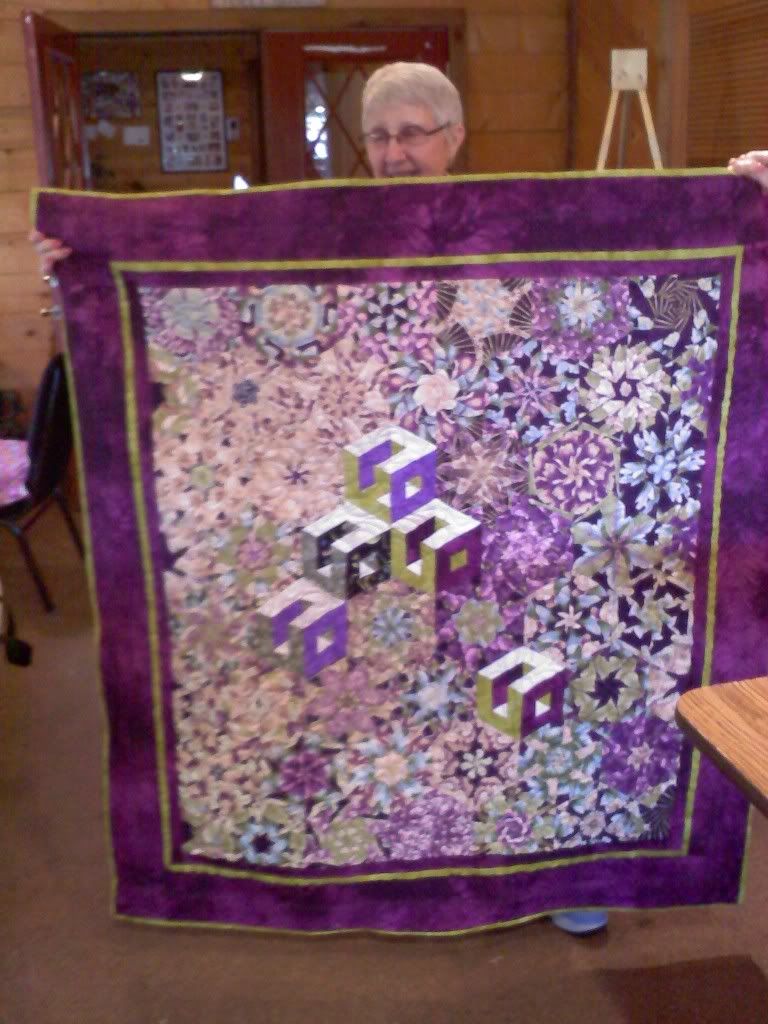
One final picture. This is Audrey, one of the ladies at retreat. She worked on her One Block Wonder Cube quilt. She was the sweetest person. She asked me to thread her needle once. I didn't tell her I couldn't see the darn thing either!
Isn't her quilt amazing?
What do you have simmering today?
Keep stitchin'!
Mary
Saturday, March 31, 2012
Monday, March 26, 2012
Monday's Makings: Taco Pizza
I did not forget about posting recipes. Last week I was traveling. I had a plan for this week but I forgot to take pictures. So, I took some tonight.
Tonight we were having leftover tacos. I use the components up by making a deep dish pizza.
It really is good. For a while we did not have this because my walking, talking appetites - also known as my sons - did not make for leftovers. AND this pan was not big enough to feed all of them (it is a 12" skillet). But now they have grown and only come home to clean up my leftovers on the weekends.
Back to the recipe. I make a cornmeal crust that is basically polenta
1 cup water
1 cup milk
1 tsp salt
1 cup cornmeal
1/4 cup Parmesan with 1 whole egg, beaten
Preheat oven to 400°F. Prepare the pan by lightly oiling and sprinkling with cornmeal.
Bring the liquids and salt to a boil. Gradually stir in the cornmeal. Remove from heat and mix until a smooth stiff dough is formed. Add the Parmesan and egg at this point.
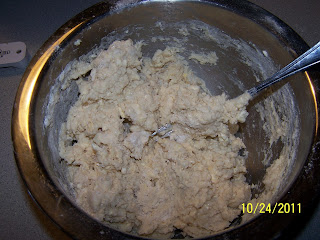
Place the mixture in the pan/skillet. Oil your hands and use them to shape edges (I did not do this tonight. More on that later!). It should look something like this.
Bake for 20 minutes. It will still look about the same when it comes out but won't be sticky anymore.
Add toppings and bake 25 more minutes. For toppings I spread the leftover refried beans. Top that with the meat. I then layer on some salsa and maybe green chilies. I add a little cheese and then put the vegetables. Tonight I put green peppers, onions, olives and the leftover tomatoes. I top it with more cheese.
You can refrigerate it at this point. I used to make it up as I cleaned up the kitchen. Then I had a quick meal for the next night.
Bake for about 25 minutes. Serve with sour cream and more salsa or hot sauce if you like.
We really like it. It is also handy because the kids or the husband can pop it in the oven to cook and it will be ready when you walk in if it is a busy night. Hope you enjoy it!
Mary
Sunday, March 25, 2012
Retreat Report and Near Misses with the Witch
Hello, all. I returned from Retreat last Monday. I had fun but I was tired. I came home and had to go to my BOM meeting that night. Then I worked 12 hr days the next three days. Since then I have tried to catch up here at home and in my sewing room.
At our retreat we met several lovely ladies. We also did a mystery quilt. I am not sure I will ever do that again. To top it all off, I had a migraine on Friday and was taking too many meds to be sewing. I screwed up so many times! I have not spent as much time "unsewing" in all of my 40+ years of sewing put together as I did that day. I finally finished at 1:30 a.m. Saturday morning.
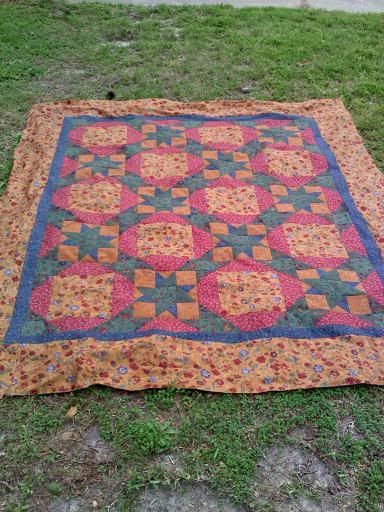
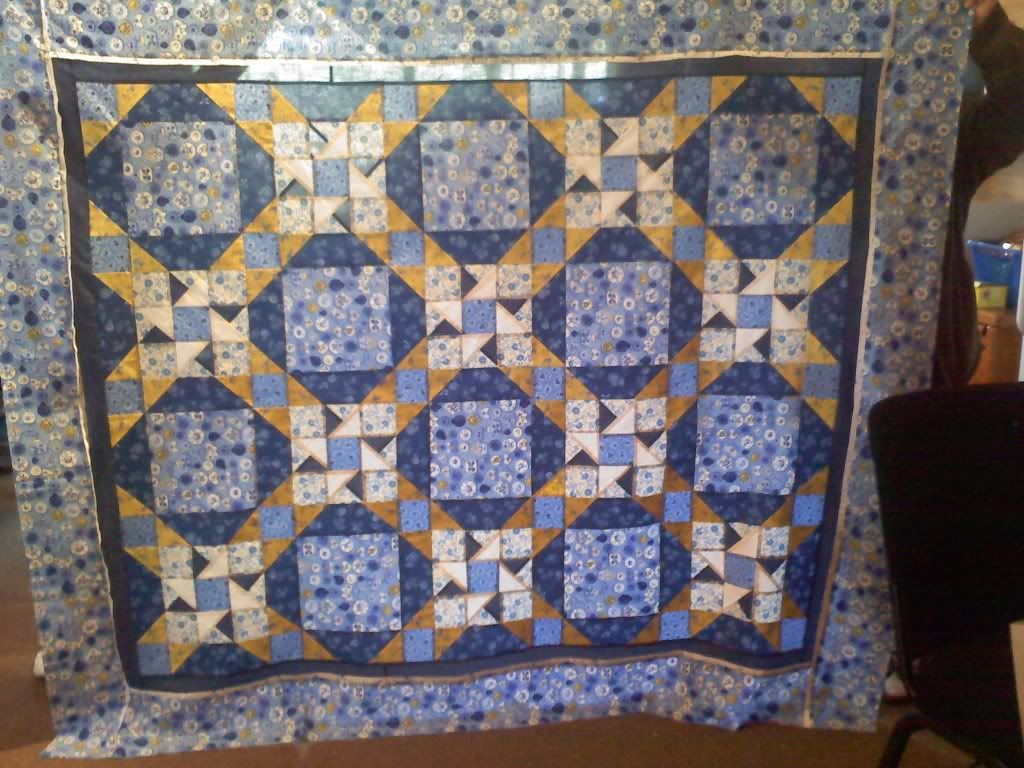
I am reasonably pleased with it. But I have to confess this is the repaired version. AFTER I got the borders on I found another mistake. Here is the picture I took at the retreat.
Look on the far right side at the middle star and the plain block below. I have the red pieces backward on BOTH of them. I was so frustrated I was just going to leave it. No one else saw it until I pointed it out. I bring it home and lay it on the floor. My husband zeroed right in on it. So, I took both pieces out and turned them around. Can't even tell. Thank You, Lord.
I am a cheap skate so I picked my own fabrics from my stash. So did some of the other ladies. Some did buy the kits but I only have pictures of one. Here are some of the others.
This is my aunts. She cut her fabric the night before we left and I got up and finished it while she showered the morning we left for the retreat. I don't like yellow but it turned out fantastic. Very much HER.
This is Ann. She also made hers from her stash. She worried the entire time but it turned out fantastic.
This is Claudia. She and her twin sister, Linda, both bought the same kit. I didn't like any of the pictures of the fabrics for the kits but they all looked great in the end.
The other thing I did is work on my stacked coins quilt I am calling Making Change. At some point I either cut wrong or changed my seam allowance. As a result I ended up squaring them all to 16 1/4" instead of 16 1/2". I think they will work fine. I am out of the white fabric. My sister is getting me more tomorrow. This is where I am so far.
I am not totally happy with it because I did not consider matching the three way split white bars with the vertical bars between the stack. I think I will like it better when it is sashed with the white strips. I bought orange batik to back it and hot pink to bind it. She loves brights. So, hopefully this will make her happy.
I also bought so much fabric while I was gone my luggage was at the weight limit. We visited three shops in Austin, one in Kingsland and went to Stitchin' Heaven three times. I was much better than some of the other women. Some of them spent $1000!
Now for the near miss with the witch. I am the witch. I just about broke out my broom Friday night. My son is a distance runner for a college. His entire team was on their cool down (this is a phenomenon non-runners can't grasp. You run more at a slower pace to "cool" your muscles). They were near a high school they had been using the track at. They were in the cross walk. They had the right of way. A car slowed and then sped up and hit two of them. One of whom was my son. Mama ain't happy! I can handle an accident but the little twit never even stopped after both of them bounced off the hood of her car. I wanted to break out the broom and fly down there to give her an attitude adjustment.
The odd thing is all three of my boys have been hit by a car while at college. The older two were on bicycles. Number 1 was at fault. He was on the sidewalk. The driver stopped and was very shaken and concerned even though #1 assured him it was NOT his fault. Number 2 was hit by a driver that blew thru a stop sign and he never stopped either. I think my kids are some sort of magnets for idiot drivers. God pity one that actually hurts one of my babies. I can't promise I won't break out my broom!
Right now I am praying that there were lessons learned by all.
I have a lot more pictures from retreat I will try to post later. My BIL asked me yesterday to make him a Marine quilt. A lady at retreat had the best Marine fabric. Unfortunately, it is sold out everywhere I find it on line! So, that is what I am stewing about.
Off to make ham balls to send back to school with #3.
Just found that Sarah over at Confessions of a Fabric Addict still has her linking party open. So, I am linking up. Thanks Sarah! Whoop Whoop! Amy Lou Who still has hers open, too. So, though I am late this week I am grateful to link up with these ladies and I am pretty sure Richard is still open.
Keep Stitchin"!
Mary
Monday, March 12, 2012
Monday's Makings: Mint Torte
Years ago due to a variety of circumstances I did in home, direct sales parties. It was a great job for me because I got to talk and cook at the same time - two activities most people would tell you I excel at! As a result of this I collected a lot of recipes. Most of them are made using too many convenience foods for my taste. I am a "from scratch" kind of cook MOST times. My variation of this recipe is one of my exceptions.
Since it is warming up around here and feeling like spring I wanted something suitable for warmer weather. This is like a creamy cheesecake. We have it in the winter, also. But we eat chili in August.
15 Oreos, finely chopped (wally world's knock offs work great)
3 tablespoons melted butter or margarine
2/3 cup of melted semi-sweet chocolate chips
1/2 to 1 teaspoon of peppermint extract stirred into melted chocolate chips*
2 8 oz packages of cream cheese, softened
1/2 cup powdered sugar
1/4 cup milk
1 8 oz container frozen whipped topping, thawed
* In place of extract and chips you can use mint chocolate chips if you can find them. I have used Andes chips but my kids like it better with the extract.
Finely chop cookies and combine with melted butter. Press crumb mixture into the bottom of a spring form pan (if you don't have one use a deep pie dish but line it with parchment or wax paper first). Refrigerate while prepping filling.
Place chocolate pieces in microwave for 1 1/2 minutes stirring every 30 seconds until smooth. Stir in mint extract. Cool slightly.
Beat cream cheese and powdered sugar until cream and smooth. Gradually beat in milk and melted chocolate mixing until smooth.
Save back 1/2 cup of the whipped topping. Gently fold the remainder into the chocolate mixture until smooth. Spread evenly over crust. Refrigerate at least 30 minutes.
Use a cake decorator and pipe the remaining topping around the edge of the torte. To be really fancy you can grate some chocolate on top if you want.
This is a really quick desert IF you have the ingredients on hand.
Hope you enjoyed it.
Check in later and I should have something up for design wall Monday. I am trying to pack for retreat. We will see how it goes.
Mary
Friday, March 9, 2012
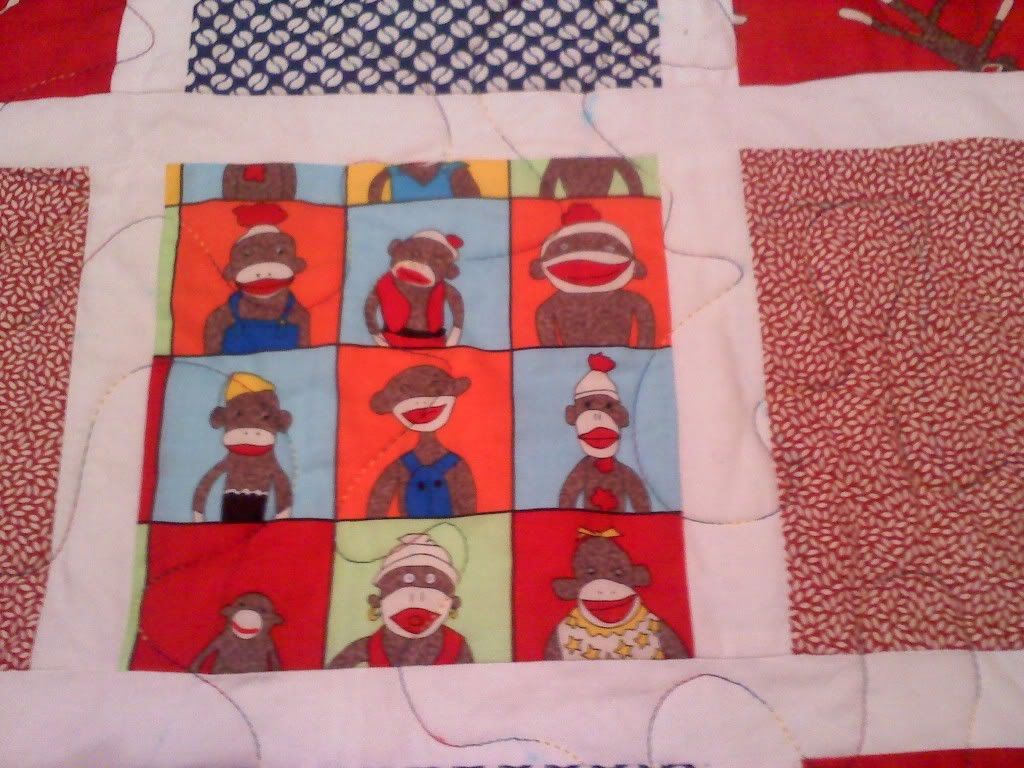
Sock Monkeys and Rags for FIUF, March 9 UPDATE: Better photos
Hello, all! I truly have a Friday finish. I was up in my sewing room at 0430 this morning working on my finish.
I did not have the week I wanted. See my previous post for what my plans were and what sent me down in the dumps. I was due back to work this morning at 0700 and I work all weekend. I leave for Texas Tuesday morning. I really wanted the Sock Monkey quilt done before then. I put it on the quilting machine yesterday afternoon.
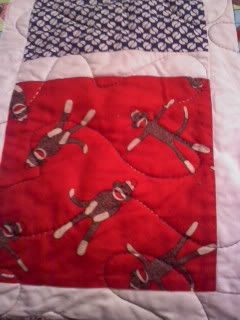
I tried something new for my free motion quilting. I had read to draw large FMQ lines and quilt back and forth over the lines so that you never sew yourself into a corner. It took some practice to get the lines right - I was drawing them too close. But it worked. The part that has me madder than a wet hen is that my water soluble marker keeps coming back!
Can you see the blue lines on the white? I am sorry for the quality of the pics and I may replace them. I wanted them before I left this morning and rushed. I won't be home before the sun goes down. This may be as good as they get for a few days.
Anyway, the quilt is now in the washer. I have warned my husband not to but it in the drier. I am hopeful he will remember to hang it up for me when he gets home.
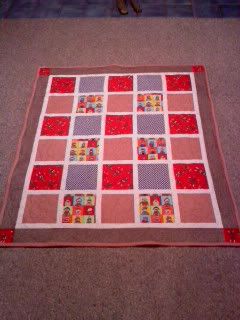
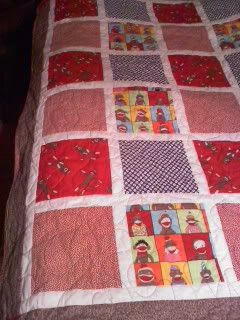
Here is the entire quilt.
Better photo:
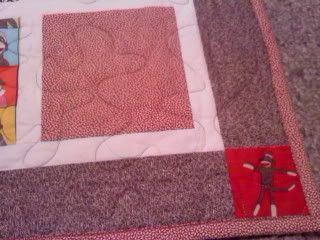
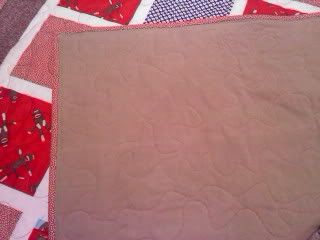
The pattern called for using the same fabric as the border for the binding but I thought it needed something more. That is the same reason I fussy cut the monkeys for the cornerstones. I backed it was some prewashed tan flannel.
I had some thread samples from Superior Threads that I used. They had sent me a red bobbin with Bottom Line in it that worked great for this after some tension adjustments. It is a very fine thread.
I used a variegated thread that they had sent (and the brand escapes me!) for the top. I love variegated threads. Must be 70s flashbacks.
I did this for a girl at work but used a pattern from a BOM project. So, have to take it to my BOM meeting on the 19th and then I will give it to her. I hope she likes it!
UPDATE: The trup through the washer took the marker out. It is a comfortable quilt. I hope the baby drags it to pieces!
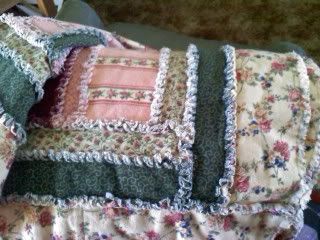
I took a picture of the strip rag quilt I made my MIL one day this week.
It looks very bright is that picture.
This is a little more like it.
I don't know what I was thinking when I bought those fabrics but my MIL loves them. So, maybe I was thinking of her. At any rate, it consumed 9 1/2 yards of my stash! Woo Hoo!
I am linking up with Amanda Jean, AmyLouWhoSews, Richard and the Fabric Addict today. Hop on over to their blogs and see what is going on with everyone else.
A big Whoop Whoop for the new grandbaby that the Fabric Addict is anticipating.
Thanks for looking!
Keep Stitchin'!
Mary
Tuesday, March 6, 2012
There is a plan & Farewell Mollie
Getting off work in 45 minutes. It will be my "weekend". I have a plan. Let's see how it goes.
Goals for today:
Get groceries - #3 is home on spring break. He informed me he is FINALLY within his recommended weight range. At 6'2" and running 80 miles a week, he requires a LOT of food to maintain that weight. Btw, he thinks he is only 6' 1". So, he weighs all of 152 lbs.
Speaking of weight, I just have to interject here. In yesterday's mail I received an invitation to join Weight Watchers for free. That wasn't so bad. I did do WW many years ago with a friend. I wanted to lose 10 lbs but I was within my "ideal" weight range. Still am. It was the second piece of mail that got me. It was addressed to me personally with the correct address. It was an offer for a seminar about bariatric surgery.
I said to #3, "My mirror and my scale must be big liars because I didn't think I was anywhere needing this." My husband told me to write, "I am NOT fat!" on the flier and mail it back. I should show up. They sent me the invitation, afterall.
Okay, next on my list. Quilt the sock monkey quilt. If I don't get the binding on before I go to Texas, that sucker is going with me.
Cut the fabric for my mystery quilt at the retreat. I seriously wonder what I was thinking signing up for this but I am going to give it a try. Stepping outside of my box.
Cut the fabric for the stacked coins quilt. I think I am looking forward to this. I hope it looks as good as I imagine. I bought bright orange variegated and bright pink variegated threads to quilt it with. My niece loves orange and pink.
The final thing on my list really sucks. Bury the dog. Today we are having our beloved collie, Mollie, put down. She is fourteen and it is time. I am afraid if we don't someone will run over her. Yesterday she got down in my MIL's drive and couldn't stand up. #3 went and helped her up but I just can't risk it. Have to be responsible. That sucks! It was so much easier when we were setting a good example for our kids. But they are now grown. I understand why people go crazy in middle age now.
There is always a little humor in our life. After EK helped Mollie up yesterday she started doing her, "I'm not dead!" act. I have warned her she may break a hip doing this but she tries. Hubby was going to go dig the hole to bury her yesterday. I told him he didn't have to and that EK and I could do it today. He grunted like he was Tool Time Tim and told me in his best cave man voice, "Digging holes is MAN work." I pointed out that EK is 21 and now a man. He let him help.
After he got out the backhoe to dig the hole, I hollered out and asked, "Are you burying the dog or ME?" He said, "Both!" When he came in he told me that digging a hole was man's work but filling it back in is woman's work. It is amazing this man has reached the ripe old age of 48 married to me and talking like that. He is gonna want to watch his back if he is giving me the shovel around a predug hole. Just sayin'....
I also hope to start sewing on my crazy quilt jacket. Better do that before the vet comes tonight because I will be a mess after that. I am doing the right thing but I will miss her like crazy.
RIP Mollie....you were a good dog. After helping me raise three boys and four other pups, you have earned a rest.
Monday, March 5, 2012
Design Wall Monday: Crazy Quilt Jacket
I am still working nights. Yesterday when I got up I managed to do a little cutting. Today I did some placement.
Here is the story.
I have observed on a couple of different occasions a crazy quilt type jacket in pastels at The Stitching Post in Washington, Indiana. As the years have passed I have found more interest in using my decorative stitches on the various machines and love this idea for that. I made up my mind I would make one to wear when I fly to the quilting retreat.... next week!
I have hundreds of patterns and was sure I would find one that would work. I did but it was not for the size I am now! That is fine. I have enlarged and reduced patterns for years. I wanted to use poly batting for it so that it didn't distort with washing. When I went to Rilleda's to get the fabric I need to finish various UFOs she showed me a beautiful poly batting from Quilter's Dream that felt like cotton. I loved it.
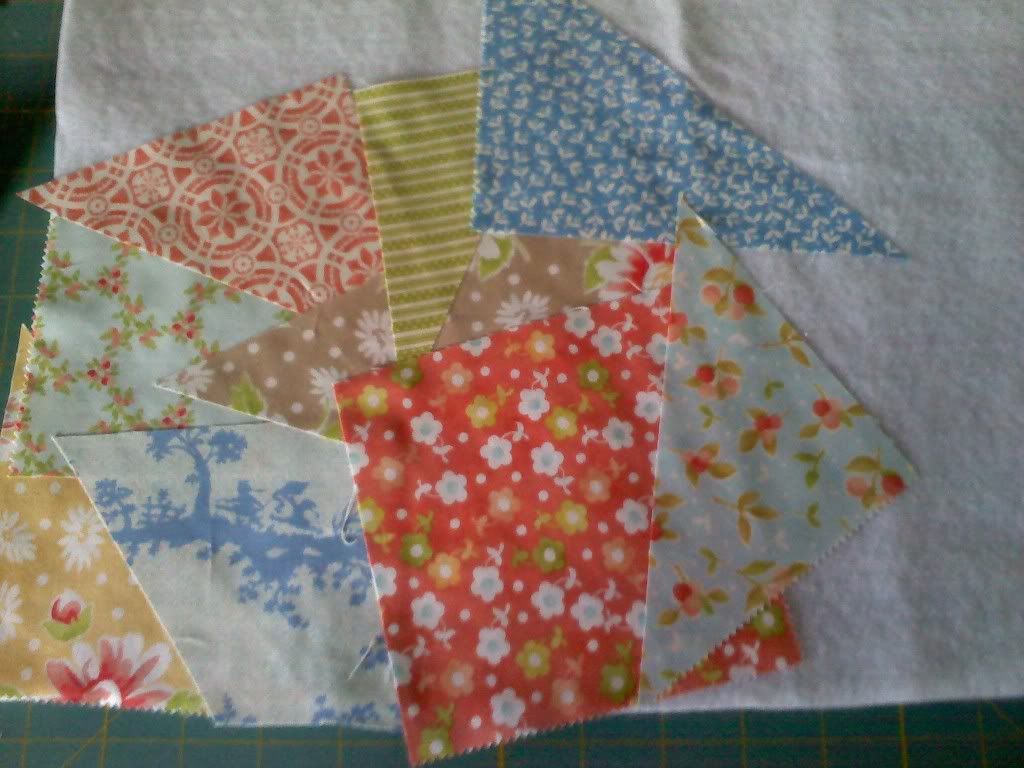
She also showed me the new Fig Trees collection, California Girls. I will be honest that I generally am not a fan of this designer. This time she has added a blue to her collection and that makes all the difference for me. I was going to link to the collection but you can see it all in a picture below. I bought a layer cake.
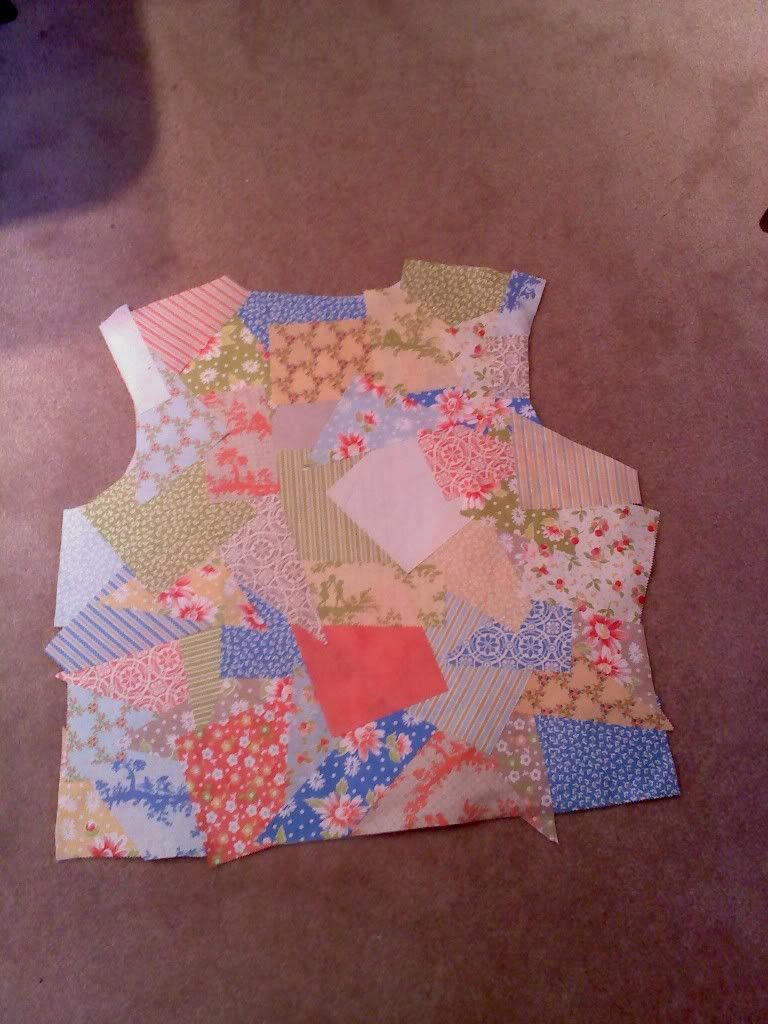
Today I finished cutting the batting and forced myself to randomly cut the fabric. That is nearly impossible for me. It offends my CDO.
I began to put the fabric on the batting. I was using a spray adhesive. I discovered that I can't pick it back up off the batting very easily and that is good because it keeps me from rearranging for "perfect".
Here is how I started.
I found myself lining the straight edges up parallel/perpendicular with the pattern edges. I made myself start working all over the piece.
This is how it ended.
I think I like it. The color in the picture isn't completely true. The peaches seem very orangy.
Once again, my design is on my floor. I have to do the rest of the pieces and start sewing. I am seriously doubting I will get it done before Texas but I am going to try.
Going to link up with Patchwork Times for her Design Wall Monday.
Hop on over there and see what everyone is doing. It will inspire you!
Keep Stitchin'!
Mary
Sunday, March 4, 2012
Monday's Makings: Mama's Crumbly Biscuits
When I started this blog I planned to talk about a variety of things I do. I really don't spend all of my time sewing, working and complaining about my migraines. Somehow I was side tracked from that. Tonight I am going to start correcting that. I am going to try to post a recipe every Monday. Some will have pictures and some won't. This one does.
Background: I have three sons.....with huge appetites and amazing metabolism. I don't know that I have mentioned it but we farmed for the first 20 years of our marriage. Another tidbit is all of my sons were/are distance runners. Food is very important to a family like ours and I don't mean takeout or frozen dinners. We eat a lot of "stick to your ribs" kind of foods.
I grew up in a fairly modest (polite way of saying nearly dirt poor) family. Biscuits and gravy were a cheap way to extend a meal. I could make milk gravy when I was in the third grade. My boys LOVE Mama's gravy. Now, I personally love those layered biscuits that come in a roll in the refrigerated section. My kids will eat them but what they prefer are what they named Mama's Crumbly Biscuits and their favorite way to eat them is with sausage gravy over them for breakfast.
I have been tweaking this recipe for about 30 years. I think it was 15 or 16 years ago I finally got it right for us. Hopefully, someone out there in blog land has been looking for the perfect biscuit recipe. My sons and their friends say this is it.
Starting with the ingredients:
3 cups of flour
4 1/2 tablespoons baking powder
1 teaspoon cream of tarter
3/4 teaspoon of salt
6 tablespoons of sugar
1/2 + 1/4 cup salted butter
1/4 cup shortening
1 cup of milk
1 large egg
Preheat the oven to 450°F.
Remove your rings and wash your hands. This is kind of a messy recipe.
Place the 1/4 cup of butter into the pan you intend to use.
If you aren't an experienced baker or your oven doesn't heat evenly, don't use a dark pan like this one.
Enough about my pan.....place the pan with the butter in it into the preheating oven.
Add the fats (butter and shortening). It is fine to use margarine if you wish. I find I feel better if I use more natural ingredients but I actually like the flavor of margarine better. I know that is weird!
Better check your pan in the oven. Is the butter melted? Nearly so? Take it out then. We just want it melted and nothing more.
Have you ever used a pastry blender? If you don't have one, use a couple of forks. I did for years. This one is from Pampered Chef and I highly recommend it. Cut the fats into the dry ingredients until the mixture looks like coarse meal or all the pieces are pea size or smaller.
Don't throw that fork in the sink! Dump all the liquid right into your bowl and take the fork with it.
Using the fork mix until everything is wet and the liquid is absorbed. Don't over mix and do not use a mixer for this.
Place about 3/4 of cup of flour onto the dough board or the clean counter if you don't have one. Dump this wet mess right into the center of that. Sprinkle a little flour across the top so that it doesn't stick to your hands too much. Knead the dough lightly by folding it to the center and then pressing down on it. Do this from each direction (side, top, side, bottom) for about 10 to 12 "kneads". Your dough should look something like this.
Try not to overwork the dough. At this point you could use a rolling pin but I just pat my dough out on the floured surface, turning it at least once to keep it floured, until it is a little thicker than my thumb.
Do you see that wine glass sitting there? That is my biscuit cutter. I haven't found one that works better for me. Word of warning here. If you are drinking wine while you make biscuits be sure to keep the full glass (okay, half empty glass) and the "biscuit cutter" separated. It is not a good thing to try to use the one you are drinking from to cut your biscuits. Ask me how I know.
Flour whatever you are using as biscuit cutter and begin to cut your biscuits. Try to use a straight down motion. Also, to minimize handling the dough, cut the biscuits as close together as you can get them.
I now take the pieces and work them back together and make a couple more biscuit from them. I can generally get a dozen wine glass sized biscuits.
Pick up a biscuit and dust the excess flour off lightly. Lay it in the pan and then turn it over so that there is melted butter on both sides.
Do this for all of the biscuit. You may have to move around the pan a bit to get butter on all of them.
As you can see, all of mine are not totally coated nor are they perfectly shaped. This isn't county fair. It is supper at home. Bake for 12 to 16 minutes until the biscuits are golden brown. Now is the time to clean up the mess made. It really is worth it.
I know. Same picture. Family came in as I was finishing up supper and I put away the camera.
These biscuits are excellent with gravy. We then like to finish the meal with a biscuit and honey, jam or apple butter. It is fine to make the biscuits and leave them set for a 30 or 40 minutes while you prep the rest of the meal. If you want to prep them the night before, the baking time will take a little longer.
I hope you enjoyed Monday's Makings!
Mary
Background: I have three sons.....with huge appetites and amazing metabolism. I don't know that I have mentioned it but we farmed for the first 20 years of our marriage. Another tidbit is all of my sons were/are distance runners. Food is very important to a family like ours and I don't mean takeout or frozen dinners. We eat a lot of "stick to your ribs" kind of foods.
I grew up in a fairly modest (polite way of saying nearly dirt poor) family. Biscuits and gravy were a cheap way to extend a meal. I could make milk gravy when I was in the third grade. My boys LOVE Mama's gravy. Now, I personally love those layered biscuits that come in a roll in the refrigerated section. My kids will eat them but what they prefer are what they named Mama's Crumbly Biscuits and their favorite way to eat them is with sausage gravy over them for breakfast.
I have been tweaking this recipe for about 30 years. I think it was 15 or 16 years ago I finally got it right for us. Hopefully, someone out there in blog land has been looking for the perfect biscuit recipe. My sons and their friends say this is it.
Starting with the ingredients:
3 cups of flour
4 1/2 tablespoons baking powder
1 teaspoon cream of tarter
3/4 teaspoon of salt
6 tablespoons of sugar
1/2 + 1/4 cup salted butter
1/4 cup shortening
1 cup of milk
1 large egg
Preheat the oven to 450°F.
Remove your rings and wash your hands. This is kind of a messy recipe.
Place the 1/4 cup of butter into the pan you intend to use.
This is my biscuit pan. I got it when my grandmother died. It is the second one I have had. My husband burnt up my first one (acquired at an auction when we were first married) by accident. This is an Ovenex pan. I have no idea when they stopped making them but I love them.
If you aren't an experienced baker or your oven doesn't heat evenly, don't use a dark pan like this one.
Enough about my pan.....place the pan with the butter in it into the preheating oven.
Place all of the dry ingredients in the bowl together. Mix them up thoroughly. I think this is a 2 quart bowl. It is my second mixing bowl, too. I wore a hole in the first. My oldest son assures me I won't live long enough to wear a hole in this one. My kids are sweet to me like that!Add the fats (butter and shortening). It is fine to use margarine if you wish. I find I feel better if I use more natural ingredients but I actually like the flavor of margarine better. I know that is weird!
Better check your pan in the oven. Is the butter melted? Nearly so? Take it out then. We just want it melted and nothing more.
Have you ever used a pastry blender? If you don't have one, use a couple of forks. I did for years. This one is from Pampered Chef and I highly recommend it. Cut the fats into the dry ingredients until the mixture looks like coarse meal or all the pieces are pea size or smaller.
Measure the milk and add the egg to it mixing it well. You may find it helpful to beat the egg before adding it to the milk. I just do it all in a 2-cup measuring cup.
Don't throw that fork in the sink! Dump all the liquid right into your bowl and take the fork with it.
Using the fork mix until everything is wet and the liquid is absorbed. Don't over mix and do not use a mixer for this.
Place about 3/4 of cup of flour onto the dough board or the clean counter if you don't have one. Dump this wet mess right into the center of that. Sprinkle a little flour across the top so that it doesn't stick to your hands too much. Knead the dough lightly by folding it to the center and then pressing down on it. Do this from each direction (side, top, side, bottom) for about 10 to 12 "kneads". Your dough should look something like this.
Try not to overwork the dough. At this point you could use a rolling pin but I just pat my dough out on the floured surface, turning it at least once to keep it floured, until it is a little thicker than my thumb.
Do you see that wine glass sitting there? That is my biscuit cutter. I haven't found one that works better for me. Word of warning here. If you are drinking wine while you make biscuits be sure to keep the full glass (okay, half empty glass) and the "biscuit cutter" separated. It is not a good thing to try to use the one you are drinking from to cut your biscuits. Ask me how I know.
Flour whatever you are using as biscuit cutter and begin to cut your biscuits. Try to use a straight down motion. Also, to minimize handling the dough, cut the biscuits as close together as you can get them.
I now take the pieces and work them back together and make a couple more biscuit from them. I can generally get a dozen wine glass sized biscuits.
Pick up a biscuit and dust the excess flour off lightly. Lay it in the pan and then turn it over so that there is melted butter on both sides.
Do this for all of the biscuit. You may have to move around the pan a bit to get butter on all of them.
As you can see, all of mine are not totally coated nor are they perfectly shaped. This isn't county fair. It is supper at home. Bake for 12 to 16 minutes until the biscuits are golden brown. Now is the time to clean up the mess made. It really is worth it.
I know. Same picture. Family came in as I was finishing up supper and I put away the camera.
These biscuits are excellent with gravy. We then like to finish the meal with a biscuit and honey, jam or apple butter. It is fine to make the biscuits and leave them set for a 30 or 40 minutes while you prep the rest of the meal. If you want to prep them the night before, the baking time will take a little longer.
I hope you enjoyed Monday's Makings!
Mary
Friday, March 2, 2012
Finish It Up Friday, March 2, 2012
As I have mentioned before, I work a funky rotating 12 hour schedule. This past week has been my "long change". In other words, I have not worked since Thursday, February 23 on night shift until tonight. You would think I would get a lot done in that time. I did not.
Between recovering from Cajun night and the weather I battled a migraine. Yesterday I took my MIL to the quilt show in Bloomington, Indiana. We both enjoyed it and I controlled myself buying fabric. But it meant no sewing.
Today I was determined to get my blocks done for my BOM. Here is the practice block I did on Monday (I think).
Not perfect, but not bad. I paid closer attention to the flying geese as I made the "real" ones today.
Still not perfect but I could live with it. Unfortunately, I didn't do so well with its mate. I am not sure why. I took it apart and resewed it and it still is lacking. Can you tell which is the good and which the bad in this photo?
They go into the quilt on point like this and they are "floating" so hopefully my screw up won't be too noticeable.
Because Amanda Jean only had blocks to show today I am going to link up with her and try not to feel guilty about not having a finish! I am also linking up with the Fabric Addict. Whoop Whoop! And, how could I forget.....I am linking up with Richard, too. I found AmyLouWho again and I think I am managing to link with her.
ETA: Richard asked about the pattern. I found one that looks the same on Quilter's Cache. The instructions I received called for cutting all of the HST before cutting. I like this one better. Try Star & Pinwheels, Richard.
Here is the other thing I did this afternoon between storms.
Yes, I know it is ugly. I was testing a design I had in my head. I used this fabric that I didn't like after I bought it on clearance at Connecting Threads. I am doing this block in bright batiks and snow white. I will rotate the block 90° as I progress across the rows and down the columns. It will be sashed in the same snow white in the same size as the sashing within the block. I didn't cut the center column apart correctly. I missed by a quarter inch. I also think I am going to move where I split the third column but still split it into 3 parts. Comments, criticisms and suggestions are welcome.
Thanks for looking!
Keep Stitchin'!
Mary
Subscribe to:
Comments (Atom)

